
The iPhone comes with its remarkable camera capabilities. They become a treasure trove of memories captured in various photo albums. As the photo collection grows, learn to deal with the art of album management. In this guide, we’ll explore how to delete albums on your iPhone.
Deleting albums on your iPhone ensures your device can optimize storage. Deleting albums on your iPhone is a simple process that can help you free up helpful storage space. Organise your photo library by tidying up your entire photo collection. Whether you want to remove a few albums or not, iOS provides an easy-to-use method to manage your albums.
In this guide, we will take you through the steps to delete albums on your iPhone. Ensuring an easy experience as you declutter your device. Keep your device well-organized.
Your iPhone’s Photos app offers an easy-to-use port for managing albums. It makes it easy to tailor your photo library to suit your choices. By deleting useless albums, you may create more space on your device. Also, simplify your photo management and make it simpler to find and enjoy the images which matter. Follow the steps below to learn how to delete albums on your iPhone effectively.
How to delete photo albums on your iPhone?
In the massive empire of your iPhone, checking the Photos app is the first step to organising your memories. Once located, enter the “Albums” tab where you arrange photo albums.
- Open the photos
- Locate the album to delete
- Tap “Select” in the top-right corner
- Choose photos to delete
- Tap the trash can icon
- Confirm deletion
- Check the “Recently Deleted” album (Optional)
Open the photos
To learn the process of how to delete photo albums on your iPhone. Open the Photos app. A colourful flower icon will represent the app. You may find it on your home screen. After locating the Photos app, tap on it. You will navigate to the “Albums” tab at the bottom of the screen.
Locate the album to delete
In the “Albums” tab, you will find a list of all your photo albums. Dip into the list to find the specific album you want to delete. You may create albums for various factors. It includes trips, events, or particular people. After identifying the target album, tap on it to open its contents.
Tap “Select” in the top-right corner
Open the selected album and find the “Select” option. You may find it in the top-right corner of the screen. Tap on “Select” to activate the selection mode. It allows you to choose multiple photos within the album to delete.
Choose photos to delete
Once in selection mode, tap on the photos you want to delete. You will notice a blue checkmark which appears on selected images. If you want to delete the complete album, skip the step and go to the next one.
Tap the trash can icon
After selecting the desired photos to delete or the entire album, look for the trash can icon. You may find the trash icon at the screen’s bottom-right corner. Tap on it to get a confirmation pop-up.
Confirm deletion
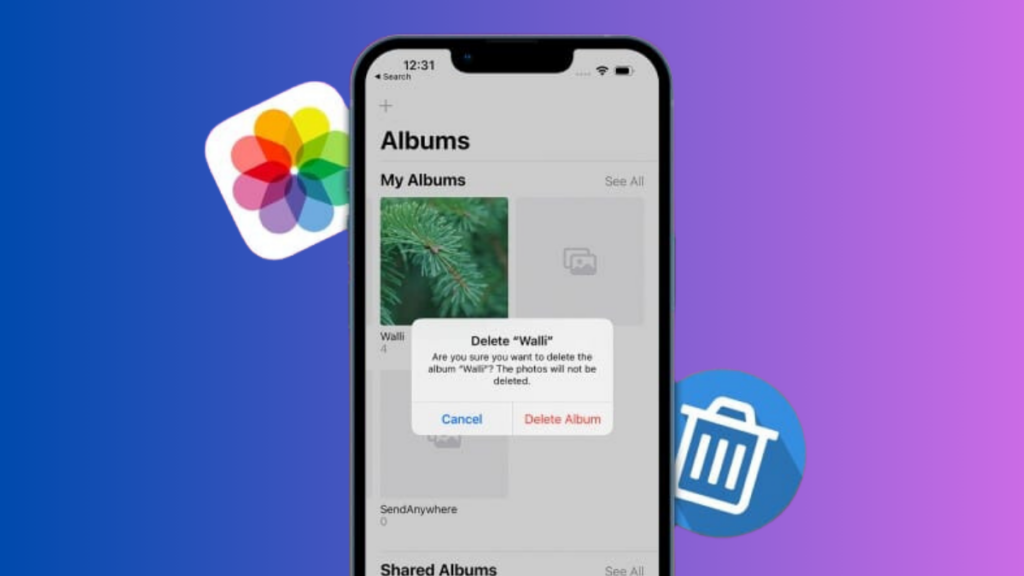
The confirmation message will ask you to confirm the deletion. Review your selection to ensure you’re deleting the correct photos or album. If everything looks good, tap “Delete [number] Photos” or “Delete Album,” depending on your selection.
Check the “Recently Deleted” album (Optional)
You moved the deleted photos and albums to the “Recently Deleted” album. It will allow a grace period if you think not to delete it. If you want to permanently delete albums on your iPhone, go to the “Albums” tab, scroll down, and tap “Recently Deleted.” Inside, tap “Select” in the top-right corner. Finally, tap “Delete All” to permanently remove the items you want to delete.
You can delete albums on your iPhone by following these steps. It will help to keep your photo library organized. Moreover, you may free up storage space on your device.
How to delete shared albums on iPhone?

Deleting shared albums on your iPhone involves a straightforward process. To delete a shared album or to remove one that you have joined, follow these steps to maintain your photo-sharing experience:
- Open the Photos app
- Go to the “Album” tab
- Locate the shared album
- Tap the “People” tab
- Remove contributors (If necessary)
- Go back to the album
- Tap “Options” at the top-right
- Select “Delete Shared Album”
- Confirm deletion
Open the Photos app
Start by opening the Photos app on your mobile. Check the colorful flower icon on your home screen. Finally, tap to launch the app.
Go to the “Albums” tab
Go to the “Albums” tab at the bottom of the Photos app. It will show a list of all your photo albums. It may also include any shared albums.
Locate the shared album
Scroll through the list of albums to find the shared album you want to delete. Shared albums have a small icon that indicates that it is a shared one. After locating the target album, tap on it to open its contents.
Tap the “People” tab
The shared album has a “People” tab at the bottom. Tap on it to reach the list of people you have shared the album with.
Remove contributors (If necessary)
If you have created the shared album, remove sponsors before deleting it. For this purpose, tap “See All” under the list of sponsors. Swipe left on the person’s name and tap “Remove.” Confirm the removal if prompted.
Go back to the album
After managing subscribers, go back to the shared album. You may tap the back arrow or use the back gesture to reach the icon.
Tap “Options” at the top-right
There are three dots in the top-right corner of the shared album screen. These dots will represent “Options.” Tap on these dots to get a menu of actions you can take.
Select “Delete Shared Album”
From the menu, select “Delete Shared Album.” An approval pop-up will appear, asking you to confirm the deletion.
Confirm deletion
Review the confirmation message to ensure you want to proceed with deleting the shared album. If you’re sure, tap “Delete Shared Album.”
You can delete shared albums on your iPhone. It helps you declutter your photo gallery and effectively manage your shared content. Deleting a shared album will remove the photos from contributors’ libraries. It will release the shared album itself.
How to delete empty albums on your iPhone?
Deleting empty albums on your iPhone is a simple process. It helps you maintain an organised photo library. Follow specific steps to remove any albums that no longer contain photos:
- Open the Photos app
- Navigate to the “Albums” tab
- Identify and open the empty album
- Tap “Edit” on the top-right corner
- Tap “Delete Album”
- Confirm deletion
- Verify the deletion
Open the Photos app
Begin by opening the Photos app on your iPhone. Locate the app icon, which matches a colorful flower. It will appear on your home screen, and tap to launch it.
Navigate to the “Albums” tab
In the Photos app, navigate to the “Albums” tab. It appears at the bottom of the screen. The tab displays a list of all your photo albums. These albums include even any empty albums.
Identify and open the empty album
Scroll through the list of albums to identify the empty album you want to delete. Empty albums often appear with a default icon. As you have found the target album, tap on it to open it, whether it is empty.
Tap “Edit” on the top-right corner
In the top-right corner of the empty album screen, press the “Edit” button. The action will allow you to make changes to the album.
Tap “Delete Album”
After entering the editing mode, look for “Delete Album.” You may find it in the same area where the “Edit” button is. Tap on “Delete Album” to begin the deletion process.
Confirm deletion
A confirmation pop-up will appear on your phone. It will ask you to confirm the deletion of the empty album. Review the message to ensure you are deleting the correct album. Finally, tap “Delete Album” to confirm.
Verify the deletion
After confirming the deletion, go back to the “Albums.” Tab to verify to remove the empty album successfully. After completing the process, you may no longer see the deleted album in the list.
You can delete empty albums on your iPhone by following the given steps. It will help you keep your photo library organised and clutter-free. However, deleting an empty album does not delete any photos. It only removes the album itself.
Why can’t I delete albums from my iPhone?
If you can not delete albums from your iPhone, there could be a few reasons. Here are some common issues and solutions:
- Restricted access
- Synced albums
- System albums
- iCloud photos
- Locked albums
- Software issues
- App permissions
- Storage issues
Restricted access
If you are using Family Sharing, it may restrict shared albums. You may not have the essential permission to delete your iPhone albums. Check your Family Sharing settings and make sure you have the correct permissions.
Synced albums
Albums synced with iTunes or other cloud services may not be directly deletable from the Photos app. It would help if you managed these albums through the platform with which they are synced.
System albums
Some albums, like “Favourites” or “People & Places,” are system-generated and cannot be deleted. These albums are populated based on your device’s features and settings.
iCloud photos
If you enable iCloud Photos, they will sync your photos and albums with iCloud. Manage your albums through the iCloud Photos settings. Go to Settings > enter your name > iCloud > Photos and adjust your settings.
Locked albums
If you have locked any albums using the Notes app or third-party apps, they may only be deletable by unlocking them first.
Software issues
Sometimes, software setbacks can cause issues. Make sure that your iPhone is running the latest iOS version. If not, update your device through Settings > General > Software Update.
App permissions
Ensure the Photos app has the essential permissions to adapt your photo library. Go to Settings > privacy > photos. Ensure the Photos app can access your photo library.
Storage issues
If your device faces low storage, it may disrupt your ability to perform specific actions. Check your available storage in Settings > General > Storage for device.
Even after trying solutions, they can still not delete albums on your iPhone. There might be a more specific issue with your device or account. In such cases, you may contact Apple Support for help.
How do I delete an album on your iPhone?
Deleting an album on your iPhone is relatively easy. Here’s a step-by-step guide:
Open the Photos App
Locate the Photos app on your iPhone, which appears on the home screen. The app icon appears as a colourful flower. Tap on it to open the app.
Navigate to the “Albums” tab
There are various tabs at the bottom of your mobile screen, containing “Photos,” “For You,” and “Albums,” with other options. Tap on the “Albums” and see a list of your photo albums.
Find and open the album
Scroll through the list of albums. Locate the one you want to delete. Please tap on the album to open it and view its contents.
Tap “Edit” in the top-right corner
After reaching inside the album, look for the “Edit” button. It appears on the top-right corner of the screen. Tap on it to enter the editing mode.
Tap “Delete Album”
While in the editing mode, you should see options for rearranging and deleting photos. Look for an option that says “Delete Album” and tap on it.
Confirm deletion
There would be a confirmation message to ensure the deletion of the albums on your iPhone. Review the message to be sure that you are deleting the correct album. Tap “Delete Album” to confirm.
How to Remove an Album from Your iPhone Photo Library
After you confirm the deletion of an album, switch back to the “Albums” tab. The album you deleted should no longer appear in the list.
Remember, deleting an album from your iPhone does not erase the individual photos within it. These images will remain safe in your camera roll or any other albums they belong to.
By adhering to these steps, you can efficiently manage and tidy up your photo library on your iPhone. Here’s how to ensure you successfully delete an album without losing any photos:
- Confirm the deletion process when prompted.
- Return to the “Albums” tab to check that the album has indeed been removed.
This straightforward process helps keep your digital memories organized without the fear of losing any cherished photos.
How do I bulk delete albums from my iPhone?
The iOS provides a straightforward way to delete photo albums in bulk. Keep in mind that the steps might vary depending on the iOS version you’re using. Here’s a general guide:
- Open “Photos”
- Navigate to “Albums”
- Tap “See All” (if needed)
- Tap “Select” (top-right corner)
- Select albums for deletion
- Tap the trash can icon
- Confirm deletion
- Verify deletion
Open “Photos”
To delete albums from your iPhone, open the Photos app.
Navigate to “Albums”
Tap on the “Albums” at the bottom of the screen. It will help to view a list of all your photo albums.
Tap “See All” (if needed)
If you have multiple albums which are not visible at once, tap “See All” to display the entire list.
Tap “Select” (top-right corner)
In the top-right corner of the screen, tap “Select” to enter selection mode.
Select albums for deletion
Tap on the albums you want to delete. You will see a checkmark on the selected albums.
Tap the trash can icon
Select all the albums you want to delete, and seek the trash can icon. It will appear at the bottom-right corner of the screen. Tap on it.
Confirm deletion
A confirmation message will appear, asking if you want to delete the selected albums. Confirm your decision.
Verify deletion
After confirming, check the “Albums” tab to ensure that the selected albums have been deleted.
There may be slight changes in the features. Refer to the latest iOS documentation or Apple’s support resources for up-to-date data.
Frequently Asked Questions (FAQs)
How do you delete various albums at once on your iPhone?
To delete various albums on your iPhone:
- Navigate to the “Albums” in the Photos app.
- Tap “Select” in the upper-right corner, and choose the albums you want to delete.
- Confirm the deletion by selecting “Delete.”
Can we recover deleted photo albums on my iPhone?
Once you delete the album on your iPhone, it goes to the “Recently Deleted” folder. In particular folders, it remains for 30 days before permanent deletion. You can recover albums in 30 days by going to “Albums”> “Recently Deleted” and restoring them.
Why am I unable to delete specific albums from my iPhone?
Several factors, such as insufficient permissions, iCloud synchronization issues, or software glitches, can prevent album deletion. Check your permissions, troubleshoot iCloud conflicts, and ensure your iOS is up-to-date to address such problems.
How do I delete shared albums on my iPhone?
Deleting shared albums on iPhone involves navigating to the “Shared” tab in the Photos app. It identifies the shared album and selects the option to remove it. Shared albums can be released from your device, but others can access them if you unshared them.
What should I do if I encounter problems deleting albums in iPhoto?
If you face challenges deleting albums on your iPhone, ensure you use the latest app version. If the issue persists, consider transitioning to the Photos app. You can follow the outlined steps for album deletion.
Can you prevent the accidental deletion of essential albums?
Keep a backup of your iPhone using iCloud or iTunes to reduce the risk of accidental deletion. It will ensure that after the deletion of the albums on your iPhone, you can restore them from your backup.
Can I delete empty albums on my iPhone automatically?
iPhones do not have an automated feature to find and delete empty albums. You must identify and delete empty albums through the Photos app manually.
What happens if I delete an album with iCloud Photos enabled?
After enabling iCloud Photos, you may delete an album from your iPhone. The feature will also remove it from other devices connected to the same iCloud account. Ensure you have a backup before deleting albums from your iPhone.
Can I recover permanently deleted albums?
As you permanently delete an album from the “Recently Deleted” folder after 30 days, you may not recover it again. Check and restore from the “Recently Deleted” folder if needed.
How do I organise albums efficiently on my iPhone?
To efficiently organise albums, use descriptive names, create subfolders, and regularly review and delete unnecessary albums. It ensures a well-organised and clutter-free photo library.
Conclusion
In the intricate dance of memories and technology, the ability to manage and delete albums on your iPhone is a skill worth mastering. Regularly organizing your digital keepsakes ensures a clutter-free device and optimal storage efficiency. So, dive into your Albums tab, tap with purpose, and let the art of deletion declutter your digital world. Remember that your iPhone and memories are essential, and keep them passable.
Mastering, managing and deleting albums on your iPhone is about something other than tidying up digital clutter. Optimizing your device’s storage and ensuring a seamless user experience are fundamental aspects. The step-by-step guide offers users an extensive toolkit for efficiently navigating photo albums. It involves deleting single albums and bulk removal and addressing common issues that may arise.
Users can curate their digital memories by understanding the difficulties of album management. They may create a more efficient and organised digital space that reflects the moments captured through the lens of their iPhone.
As technology continues to evolve, the ability to navigate album management becomes valuable. Users can take charge of their photo collections with the outlined strategies and troubleshooting tips. It will ensure that cherished moments remain accessible while eliminating needless digital baggage.
In the ever-expanding view of digital memories, the power to curate, organise and delete albums on your iPhone transforms the device into a personalized gallery. It engages users with their memories, ultimately enhancing the overall iPhone experience.

